![]() Search tips
Search tips
- To search in a subset of topics, select
 in the search field and select a filter.
 - To search for a specific word or phrase, add quotation marks around it (example: "budget column") in the search field.
- To remove highlighting on the search terms in a topic, select
 .
. - To search within a topic, select
 , press Ctrl+F, and enter the search term.
ProjectSight Mobile
Take ProjectSight's cloud-based construction project management software with you in the field on your phone or tablet.


In the portfolio or project settings, you can create company records. The list of companies and all company details are the same in both places.
Companies can be categorized in the following ways:
- Primary company: The company named in the Information panel of the Project form. The sharing setting can be set to include the primary company.
- Participating company: The company of a record participant. The sharing setting can be set to participating companies.
- Project company: A company that has at least one contact with access to the current project. Only project companies can be selected directly in company fields, but you can search for non-project companies through the Company Search dialog.
- Open the settings.
- In the Portfolio settings or Project settings section of the menu, select Companies.
- In the company settings, select the company record.
 Create a report from a report template.
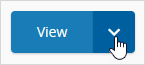
- On the button, select
 , and then select an option:
 - View
- Download
- Email

—Or—
Tab names aren't displayed if the report only contains one company or if there are no report templates.
 to find or create a contact.
The available options depend on the type of report.
A company record contains several tabs where you can enter details in the grids.
To automatically associate a contact with the project, you can add the contact to the company in the project settings.
- On the navigation toolbar, select Add.
- In the Name field, enter a unique name for the company.
- In the Information panel, enter the company information.
- On the Addresses tab, add the addresses.
- On the Contacts tab, add the contacts.
- On the Crews tab, add the crew information.
- On the Insurance tab, enter the insurance information.
- On the other tabs, enter additional company information.
- To save the changes and keep the record open, select
 (Save).
—Or—
To save the changes and close the record, select ![]() (Save).
(Save).
- In the company settings, on the company row, select
 (More) > Copy.
 - In the new company record, edit the information.
- To save the changes and keep the record open, select (Save).
The company's address, contacts, and crew are not copied.
—Or—
To save the changes and close the record, select ![]() (Save).
(Save).
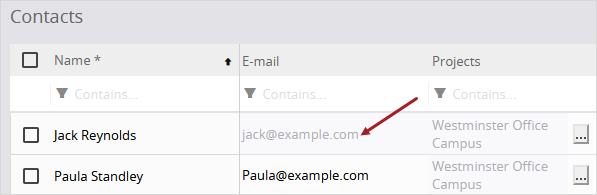
Companies are linked indirectly to a project through their contacts. The Contacts tab includes people who are associated with the company through user records or are created in the Contact Search dialog. However, only active contacts are available for the project forms.
To automatically associate a contact with the project, you can add the contact to the company in the project settings.
If the First Name, Last Name, Work Phone Number, and Mobile Phone Number fields are updated in the user's profile, the First Name, Last Name, Telephone, and Cell Phone fields are updated on the Contacts tab.
- If you change the user's information on the Contacts tab, the user profile isn't affected.
- Contacts that are set as default assignees can't be deleted.
- On the Contacts tab, select Add.
- Enter the details for the contact.
- The Name cell, which must be unique, is filled automatically based on the First Name and Last Name cells. However, if you have the Modify permission for this field, you can manually change it after it is filled.
- The Main portfolio contact checkbox can only be selected for one default contact in the company.
- The Active checkbox is selected by default. Only active contacts appear in the contact selection dialogs.
- If you select a crew, the number of crew members is updated automatically in the Workers column on the Crews tab.
- The Trade and Classification are added to detailed labor cards, where it is required information, if this contact is part of a crew.
- The options in the Location cell come from Addresses tab. The selected location is used when the contact is added to a form.
- To make this person a project contact, select
 in the Projects cell, and then select the project.
 - In the Notes cell, select , and then enter notes for the contact.
- In the Portfolio role cell, select a role. This is an information field that isn't used anywhere else.
The selection is also updated in the Main portfolio contact column of the team members grid.
The company name and address aren't copied to the contact's profile.
- On the Contacts tab, select in the Projects cell.
- Select or clear the checkboxes for the projects.
- Select Select.
- If the contact is also a ProjectSight user, remove the user from the portfolio.
- On the Contacts tab, select the checkbox for the contact, and then select Remove.
For ProjectSight users, the E-mail cell is read-only.
The deleted contact is still linked to existing items such as records but can't be linked to any new ones.
In daily reports, you can add labor cards to track work hours or days for each crew. Each company can have multiple crews with their own default values.
| Column | Description | Calculation |
|---|---|---|
| Default UOM | The unit of measurement for the crew. | |
| Default Hours | The number of hours that are added to the labor card for this crew if the Default UOM is Hours. | Finish Time - Start Time - Break Hour * Workers —Or— Manually entered number |
| Default Days | The number of days that are added to the labor card for this crew if the Default UOM is Days. If the Workers cell is greater than 0, the Default Days cell is changed automatically to match. |
Equal to Workers —Or— Manually entered number |
| Hours Per Day | The number that is used to calculate adjustments to labor card quantities and to convert them for the summary. To ensure that Hours Per Day is greater than 0 for the crew, do one of the following:
|
Default Hours / Default Days |
| Workers | The number of workers that are added to the labor card for this crew if labor cards are set to display workers.
You can also add workers when you add a labor card to a daily report. However, those workers aren't added to the Contacts tab of the company. |
Updated from Contacts tab as contacts are added to or removed from the crew —Or— Manually entered number |
- On the Crews tab, select Add.
- In the new row, enter a unique name for the crew.
- To set the Hours Per Day, enter the Start Time, Finish Time, and Break Hour.
- On the Contacts tab, in the Crew cell, select the crew.
- In the Default UOM cell, select the default unit of measurement.
- To make this crew the default that's selected when you add a labor card for the company, select the Default checkbox.
The difference between the Start Time and Finish Time must be greater than the break hour. If an error message is displayed, you can edit the current cell before changing another cell..
—Or—
Enter the Default Hours and Default Days.
—Or—
In the Crews grid, enter a number in the Workers cell.
If the Workers cell is locked, the number comes from the company contacts that are assigned to the crew in Contacts grid.
- On the Contacts tab, in the Crew cell, select or remove the crew for the company contact.
—Or—
In the Crews grid, edit the number in the Workers cell.
If the Workers cell is locked, the number comes from the company contacts that are assigned to the crew in Contacts grid.
- Select the checkbox for the crew, and then select Remove.
If this is the default crew, the next available crew becomes the default.
You can't delete a crew if it's associated with a company contact or if it's the last crew.
You can export records to an Excel file where you can edit them and create new ones. Then you can import the file, which can only be used once, back into ProjectSight. If there are any errors, you can review and fix them in a new Excel file.
You can export companies and other company-related information, such as contacts, addresses, and crews, to an Excel file where you can edit them, add new information, and import back into ProjectSight.
- Record and field permissions are checked when you export companies to an Excel file and when you import the file into ProjectSight.
- In the Excel file, required fields are light red, and read-only fields are light blue. Rows cannot be deleted from the spreadsheet.
- The Excel file can only be imported into the portfolio or project that it was exported from.
When you import the Excel file back into ProjectSight:
- Company-related information is added under the company.
-
If new values were entered after this spreadsheet was exported, your edits are flagged.
- In the module, filter the records that will be exported to Excel.
- In the Search panel, set the filters.
- To export specific records, select their checkboxes. If none are selected, all the records are exported.
- In the list view, add and rearrange the columns, and then save the custom view.
- On the navigation toolbar, select
 (Import/Export) > Export to Excel.
 - Open the Excel file.
- Enter the company details.
- To add contacts for the new company, do the following:
- Select the Addresses tab and then enter an address for the new company.
- Select the Contacts tab and then enter the new contacts.
- Company, Location and contact's Name are marked as required.
- The contact's Name must be unique in the company. If you leave it blank in the Excel file, ProjectSight will create one based on the imported First and Last Name.
- There can only be one Main contact. To assign a new contact as the Main contact, ensure that no other contacts are assigned as the Main contact.
- Edit any existing company information.
- Save the Excel file.
- In ProjectSight, open the settings.
- On the navigation toolbar, select (Import/Export) > Update from Excel.
- Select the Excel file to import.
The Excel file will display the columns for the fields in the list view followed by the remaining fields.
The Excel file contains the required fields and the fields that you have permission to view.
Ensure that there are no leading or trailing spaces in the Company Name.
This step is required before adding new contacts. Also, ensure that there are no leading or trailing spaces in the Address Location.
You can copy and paste unlocked cells.
- In the import error message, select Review errors.
- Review the Feedback column and fix the associated errors.
- Save the Excel file.
- In ProjectSight, open the settings.
- On the navigation toolbar, select (Import/Export) > Update from Excel.
- Select the Excel file to import.
The records with errors are exported to a new Excel file.
You cannot delete companies that are linked to a ProjectSight user or to a record.
- If the company contains ProjectSight users, remove them from the portfolio.
- In the view, on the record, select (More) > Remove.
For ProjectSight users, the E-mail cell is read-only.
—Or—
Select ![]() (More) > Delete selected records.
(More) > Delete selected records.