Search tips
- To search in a subset of topics, select
 in the search field and select a filter.
 - To search for a specific word or phrase, add quotation marks around it (example: "budget column") in the search field.
- To remove highlighting on the search terms in a topic, select
 .
. - To search within a topic, select
 , press Ctrl+F, and enter the search term.
You can link different types of items to a record. The linked items appear in the activity stream and the Links panel. Depending on the linked item, the link is one-way (only appears in the originating item) or two-way (appears in the originating item and the linked item).
- Open the full record.
- On the navigation toolbar, select
(Links).
- In the Links panel, in the Search field, enter the search terms.
On each tab, the search terms apply to the file name, description, record number, and subject. The tab numbers are updated according to the search results.
- In the Links panel or in the activity stream, select the item.
If you open a linked drawing, the drawing annotations are filtered so you only see the ones that the record is linked to. You can select Remove Applied Filters to view all the annotations in the drawing.
Items that are selected for linking appear in the Pending list of the Add Link popover and on the appropriate tab in the Links panel. After the record is saved, the linked items appear in the activity stream on the Comments tab.
If you link an uploaded photo or a photo from the file management system, the photo also becomes available in the Photos module. After the linked photo is processed, it's displayed in the photo viewer when you open it.
- If records are configured to use workflow templates, you can select the template if more than one is available when you create or copy linked records.
- If you link a Microsoft Office file (.xlsx, .xls, .docx, .doc, .pptx, .ppt, .vsdx), you must save the change before you can open the linked file.
- You can't upload and link .exe, .dll, .js, .php, .aspx, .html, .htm, and .svg files.
- In the Links panel, select
(Add Links).
- Select Drawings.
- Set which drawings are visible in the list.
- To show the current versions of the drawings, turn the Revisions toggle off.
- To show the specific revisions, turn the Revisions toggle on.
- Select the checkbox for one or more drawings.
- Select Done.
- To exclude the linked drawing from system-generated notifications and from the list of attachments that can be embedded in reports in the Print report dialog, turn off the Include in email notifications toggle in the Links panel.
To link to a drawing set, select Records > Drawing set in the Links popover.
If you link a current version, the link always points to the current published version and is updated when a new revision is published.
If you link a specific revision, the link always points to the selected revision.

If the email notification includes a report with links, the linked drawing is still included in the report.
- In the Links panel, select
(Add Links).
- Select Specifications.
- To link the current version of a published specification, select the checkbox for one or more specifications.
- Select Done.
To link to a specification set, select Records > Specification set in the Links popover.
- In the Links panel, select
(Add Links).
- Select Records, and then select the record type.
 Create a record, and link to it.
- Select Done.
- If you link to or from a checklist, the link goes to the selected revision, even if another revision is created later.
- If you link to a new transmittal, you can include a report for this record.
- If you don't have the feature permission for future daily reports, you can only create daily reports for today's date, based on the timezone in your profile, or earlier.
Record types are made available for linking in the settings.
—Or—
Select the checkbox for one or more existing records.
- In the Links panel, select
(Add Links).
 Upload and link a file.
- To exclude the linked file from system-generated notifications and from the list of attachments that can be embedded in reports in the Print report dialog, turn off the Include in email and reports toggle in the Links panel.
—Or—
![]() Select a file from the File Library.
Select a file from the File Library.

If the email notification includes a report with links, the linked file is still included in the report.
- In the Links panel, select
(Add Links).
- Select Web link.
- Enter the description and the URL, and then select Done.
- In the Links panel, select
(Add Links).
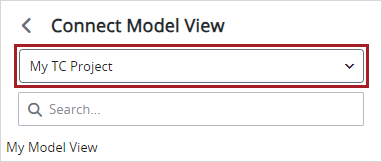
- Select Connect model view.
- Select a Trimble Connect project.
- Select a model view.

- In the Links panel, select
(Add Links).
- Select Connect BCF Topic.
- Select a topic.
—Or—
In the comment, select (Links).
The list displays topics from Trimble Connect. For information on creating and managing topics, see the Trimble Connect help.
The linked topic is displayed on the Designs tab of the Links panel.
You can edit linked items in the Links panel. If you edit a linked photo in the photo viewer, the changes are synced to the photo in the file management system. However, edits to the photo in the file management system aren't synced to the photo in the Photos module.
- In the Links panel, on the item, select
(More) > Rename.
- Edit the file name.
- Press Enter, or select outside of the field.
—Or—
Select the file name on the item.
The changes aren't logged on the History tab of the record.
- In the Links panel, under the file thumbnail, select
(Edit).
- Enter the description for the file.
- Press Enter, or select outside of the field.
The changes aren't logged on the History tab of the record.
- On the Files tab of the Links panel, select the drag handle of the file, and then move it to a different position.
Drag handles are available only when the files are not filtered by any search terms.

The changes are logged on the History tab of the record.
You can delete items that are linked to a record.
- To switch to the Select mode, select the checkbox for a record.
- To choose more records, select each one.
- Select
(Download).
—Or—
To choose all the records, select the Select all checkbox on the navigation toolbar.
The linked items are downloaded in a ZIP folder. Linked drawings aren't included.
If you only want to download the files for one record, you can select (More) > Download Linked Files on the record instead.
- On the Files tab, select the checkbox (
) for the items.
- At the top of the Links panel, select
(Download).
—Or—
Select the checkbox () for one item, and then select the Select all checkbox.
The checkbox is only available for items that can be downloaded.
The files are downloaded in a ZIP folder.
If you only want to download one item, you can select (Download) on the card or tile instead.
- On the Designs tab, select the checkbox (
) for the drawings.
- At the top of the Links panel, select
(Download).
- In the Download dialog, set the download options.
- Content: Select the cover page.
- Public Annotations: Include or exclude all public annotations.
- Private Annotations: Include or exclude your private annotations.
- As Builts: Include records, specification sets, drawings, specifications, models, URLs, and files that are linked to the annotations.
- Download As: When multiple drawing are selected, download one .pdf file with all the drawings, or download a .pdf file for each drawing. If the As Builts toggle is on, the files are downloaded in a ZIP folder.
- File Name: Edit the file name.
- Select Download.
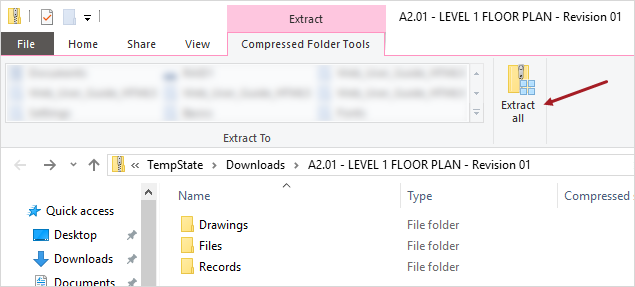
- To ensure that the linked annotations work in the downloaded drawing, extract the files from the ZIP folder.
- Open a drawing in a PDF reader, and then select an annotation to open the linked item.
—Or—
Select the checkbox () for one item, and then select the Select all checkbox.
If you only want to download one drawing, you can select (Download) on the card or tile instead.
If you only download one drawing, its linked drawings aren't included, so you must select the linked drawings as part of the download.

Extracting files in File Explorer
If you open the downloaded drawing in a browser, the annotation links don't work.
You can remove a linked item in the following ways:
- Remove the item from the Links panel. The link is removed, but the item remains in ProjectSight.
- Delete the linked item from ProjectSight. The item no longer appears in the Links panel wherever it was linked.
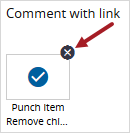
- In the comments field, on the linked item, select
(Remove).

- In the Links panel, on the linked item, select
(More) > Remove.

