![]() Search tips
Search tips
- To search in a subset of topics, select
 in the search field and select a filter.
 - To search for a specific word or phrase, add quotation marks around it (example: "budget column") in the search field.
- To remove highlighting on the search terms in a topic, select
 .
. - To search within a topic, select
 , press Ctrl+F, and enter the search term.
ProjectSight Mobile
Take ProjectSight's cloud-based construction project management software with you in the field on your phone or tablet.


The PDF viewer displays PDFs that are uploaded from the following areas:
- File Library (if it's the file management system)
- Trimble Connect (if it's the file management system and ProjectSight is set as the PDF viewer)
- Links panel
- If the PDFs are uploaded in a drawing set, they're displayed in the drawing viewer when you open them.
- In edit mode, you can add annotations and comments to the PDF, but you cannot edit the PDF content.
- If multiple users have the same PDF open at the same time, the PDF only retains the changes from the last user who edits and saves the file.
- User A, User B, and User C open the same PDF in the PDF viewer.
- In the PDF:
- User A adds a custom stamp and a signature.
- User B replies to a note.
- User C doesn't make any changes.
- The PDF is saved by each user in this order: User B, User A, User C.
When the PDF is reopened, only User A's custom stamp and signature are displayed. User C didn't make any changes, so User A was the last one to save her changes.
- Navigate to the file in the File Library or Links panel (Files tab), and then select it.
- To change the page transition or page layout, select
 (View Controls), and then select an option.
 - To use the pan mode, select
 (Pan).
—Or—
To use the select mode, select  (Select).
- In the PDF viewer, select (View Controls, and then select Rotate Clockwise or Rotate Counterclockwise.
- Select
 (Save).
- Select
 (Search) on the toolbar, and then enter the search terms in the field.
 - To apply a filter, select the checkbox:
- Case sensitive: Find matches with the same capitalization.
- Whole word: Find exact matches of the search term.
- In the PDF viewer, select
 (Save).
The PDF viewer toolbar includes tools for adjusting the view and adding annotations.
| Button | Group | Name | Description |
|---|---|---|---|

|
Annotate | Underline | Underline the text. |

|
Annotate | Highlight | Highlight the text. |

|
Annotate | Squiggly | Add a squiggly line to the text. |

|
Annotate | Strikethrough | Add a strikethrough to the text. |

|
Annotate —And— Shapes |
Rectangle | Add a rectangle. |

|
Annotate | Free Text | Add a text box. |
 |
Annotate —And— Shapes |
Free Hand Highlight | Draw a freehand highlighter line. |

|
Annotate —And— Shapes |
Free Hand | Draw a freehand line. |

|
Annotate | Note | Add a note. |

|
Shapes | Line | Draw a straight line. |

|
Shapes | Polyline | Draw a multi-point line. |
|
|
Shapes | Arrow | Add an arrow. |

|
Shapes | Arc | Draw an arc. |

|
Shapes | Circle | Draw a circle. |

|
Shapes | Polygon | Draw a multi-sided shape. |

|
Shapes | Cloud | Draw multi-sided cloud. |

|
Insert —And— Fill and Sign |
Rubber Stamp | Add a standard or custom stamp. |

|
Insert —And— Fill and Sign |
Signature | Add a signature. |

|
Insert | Image | Add an image from your computer. |

|
Insert | File Attachment | Attach a file from your computer. |

|
Insert | Callout | Add a callout. |

|
Fill and Sign | Cross | Add an X. |

|
Fill and Sign | Tick | Add a check mark. |

|
Fill and Sign | Dot | Add a dot. |

|
Fill and Sign | Calendar | Add today's date. |

|
-- | Color | Select a color for the annotation. These buttons change based on the selected annotation. |

|
-- | Style | Open the Style panel. The style options depend on the type of annotation. |

|
-- | Undo | Undo the last action. |

|
-- | Redo | Redo the last action. |

|
-- | Eraser | Erase an annotation. |
You can add different types of annotations to a PDF. The name of the annotation tool is displayed when you hover over it on the toolbar.
Some annotations use a default style, but you can select a different style. You can't set the default styles, but your current selections are used as long as you open PDFs in the same tab and module. After you open another PDF in a new tab or navigate to a different module and then open a PDF, the annotations use the default styles again.
Some annotation tools remain active until you select (Select) or press Esc.
- On the toolbar, select Shapes, and then select the Free Hand Highlight, Free Hand, Arrow, Line, or Polyline tool.
- To draw the line, do one of the following:
- Free Hand Highlight or Free Hand: Select the PDF and draw the line. There's a brief delay before the annotation is created so you can draw multiple lines.
- Arrow or Line: Select the PDF and draw the line.
- Polyline:
 Draw the first side, and then add the other sides.
A note is added to the Comments panel when the annotation is created. If you select ![]() (Save) before that happens, the annotation isn't saved.
(Save) before that happens, the annotation isn't saved.
- On the toolbar, select Shapes, and then select a shape tool.
- To draw the shape, do one of the following:
- Ellipse or Rectangle: Select the PDF and draw the shape.
- Cloud or Polygon: Draw the first side, and then add the other sides.
- Arc: Mark the beginning, middle, and end of the arc.
- On the toolbar, select Insert, and then select the Callout tool.
- Select the PDF, draw the first side of the callout arrow, and then select again for the endpoint.
- Draw the other side of the callout arrow, and then select for the endpoint.
- Enter the callout text.
- On the toolbar, select the Free Text tool.
- Select the PDF, and draw the text box.
- Enter the text.
—Or—
Select the PDF to place the text box.
- On the toolbar, select Insert, and then select the Image or File Attachment tool.
- Select the PDF to place the annotation.
- Select the file from your computer.
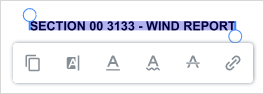
- On the toolbar, select a text tool, and then select the text on the PDF.
—Or—
Select  (Select), select the text, and then select an option on the menu.
You can add standard and custom stamps to a PDF. Your custom stamps are available automatically in all the projects that you have access to in each portfolio.
Custom stamps are only available to the user who created them.
- On the toolbar, select Insert or Fill and Sign, and then select (Rubber Stamp).
- Open the stamp list.
- Select the Standard tab, and then select a stamp.
- To place the stamp on the PDF, select the PDF.

- On the toolbar, selectInsert or Fill and Sign, and then select (Rubber Stamp).
- Open the stamp list.
- Select the Custom tab.
- Create a custom stamp.
- To place the stamp on the PDF, select the PDF.
—Or—
Select a previously created custom stamp.
- In the stamp list, select
 (Delete) next to the custom stamp.
You can create a custom signature and add it to a PDF. Your signatures are available automatically in all the projects that you have access to in each portfolio.
- Saved signatures are only available to the user who created them.
- You can create a maximum of 4 signatures.
- Select Insert or Fill and Sign, and then select (Signature).
- Draw a signature.
- Select Create.
- To place the signature on the PDF, select the PDF.
—Or—
—Or—
- In the signature list, select (Delete) next to the signature.
You can add notes and replies to annotations.
- On the toolbar, select
 (Comments).
- In the Comments panel, select Filter, and then select the filters.
- Select Apply.
- In the Comments panel, select an option:
- Position: Sort the notes by the order (top to bottom) that they appear in the PDF.
- Created Date: Sort the notes by the date that they were created.
- Modified Date: Sort the notes and replies by the time that they were modified.
- Status: Sort the notes by the status.
- Author: Sort the notes the author's name.
- Type: Sort the notes by the annotation type.
- Color: Sort the notes by the annotation color.
- On the toolbar, select Annotate, and then select (Note).
- Select the PDF in the viewer to place the note.
- In the Comments panel, enter your comment, and then select Save.
The icon changes to the default color. You can also change the color from the Style menu.
You can also select an annotation and then add a note in the Comments panel.
- In the Comments panel, select the note.
- At the top-right of the note, select the status icon, and then select a status.
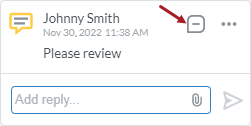
- In the Comments panel, select the note.
- Enter your comment in the reply field, and then select
 (Post).
- In the Comments panel, select the note.
- In your reply, select
 > Edit or Delete.
 - You can only edit but not delete the first note of an annotation.
- If you have permission to add and modify notes and replies for public annotations, you can edit the first note that you or another user added. Otherwise, you can only edit the first note that you added.
- You can only edit and delete your own replies to the first note of an annotation.
You can edit annotations. Each annotation has a Style menu that may display the following options:
- Add a comment
- Style the annotation
- Add a link to the annotation
- Delete the annotation
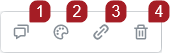
Some annotations may have more menu options.
- Select the annotation.
- Select the annotation.
- On the Annotation menu, select
 (Style).
 - Do any of the following:
- Depending on the type of annotation, you can set options in different sections, such as Text Style.
- To adjust the opacity of an annotation, select and move the Opacity slider.
- To adjust the stroke width of a line annotation, select and move the Stroke slider.
- Select the annotation.
- Select and drag the middle of the annotation.
- Select the annotation.
- Select and drag a sizing handle.
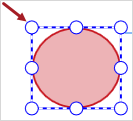
For some annotation types, you can also move the sizing handles to change the shape.
- Select the annotation.
- On the style menu, select (Delete).
When you download or print a PDF, the annotations and notes are included.
- If you change the page rotation, save the changes before you download or print the PDF.
- The appearance of annotations in the downloaded or printed PDF may differ from the browser.
- For best results, open PDFs in Adobe Acrobat Reader.
- On the toolbar of the PDF viewer, select
 > Download.
—Or—
In the File Library or Links panel, select the PDFs, and then select ![]() (Download) on the toolbar.
(Download) on the toolbar.
If new annotations aren't included in the downloaded PDFs, you can reopen the file management system or linked item and then download the files again.
- On the toolbar of the PDF viewer, select > Save As.
- Enter the file name, and then select the file type.
- Select the pages that you want to print.
- All: All the pages in the PDF.
- Current Page: Only the page that's currently visible in the viewer.
- Specify Page: Only the specified page numbers.
- To include annotations in the save file, select the Include Annotations checkbox.
- Select Save File.
- On the toolbar of the PDF viewer, select > Print.
- To open the print dialog of the browser, select the print button on the tab.
- Set the printing options, and then select Print.
The PDF opens in a new tab.