Search tips
- To search in a subset of topics, select
 in the search field and select a filter.
 - To search for a specific word or phrase, add quotation marks around it (example: "budget column") in the search field.
- To remove highlighting on the search terms in a topic, select
 .
. - To search within a topic, select
 , press Ctrl+F, and enter the search term.
You can edit the options for a data entry field.
- If a lookup list is locked (
) in the project, it's inherited from the portfolio. To edit the lookup list in the project settings, you can unlock it.
- When the Discipline lookup list is used for default assignees in RFIs:
- If you unlock the default assignee setting for RFIs, the setting still uses the portfolio-level Discipline lookup list unless you also unlock the lookup list.
- If you unlock the Discipline lookup list, the default assignee setting for RFIs is also unlocked.
- When you group drawings in the data view by Discipline, the disciplines are displayed in the same order as the lookup list.
- Lookup lists for the Project form and the Company form are available only in the portfolio settings.
- Open the settings.
- In the Portfolio settings or Project settings section of the menu, select Lookup lists.
- In the lookup list settings, select the lookup list.
You can edit the options in a lookup list. The changes are saved automatically.
- Select Add new row.
- Enter the code, and then press the Tab key.
- Enter the name, and then select outside of the field.
The name can have a maximum of 150 characters.
- Select the item.
- Edit the name, and then select outside of the field.
- Select the Item, and then drag it to a different position in the list.
—Or—
To sort the items alphanumerically, select (Sort) on the toolbar.
You can export lookup lists from your portfolio to an Excel file where you can add new items to a lookup list, delete existing ones or re-order your list.
- Rename lookup items in the web application rather than through the Excel import sheet so that they're also updated in any records that use them.
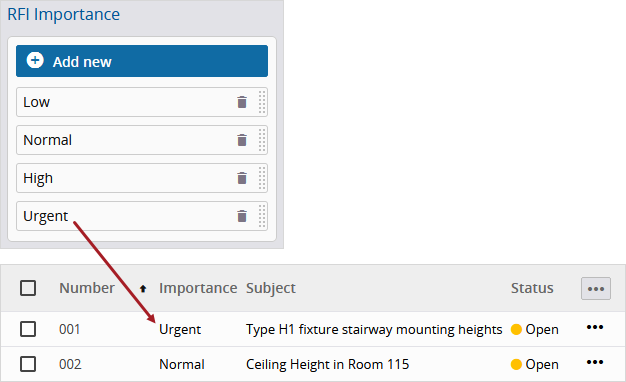
- In an RFI, you select High in the Importance field.
- In the lookup list settings, you change the lookup item name from High to Urgent.
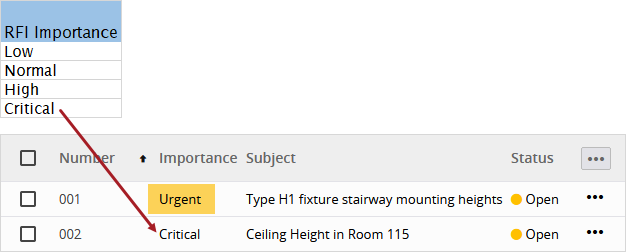
- You export the lookup lists to Excel and change the lookup item name from Urgent to Critical.
- You import the Excel file back into ProjectSight.
- Record and field permissions are checked when you export lookup lists to an Excel file and when you import the file into ProjectSight.
- The Excel file can only be imported into the portfolio that it was exported from.
In the RFI, the lookup item is changed automatically to Urgent.

In the lookup settings, the lookup item name is changed to Critical.
In the RFI, the lookup item name is still Urgent. When you select the same lookup item for another RFI, the lookup item name is Critical.

When you import the Excel file back into ProjectSight:
- New lookup items are added.
- Deleted lookup items are removed from lookup lists.
- Reordered items are reflected in the lookup lists
- In the portfolio settings, open the lookup list settings.
- On the navigation toolbar, select
(Import/Export) > Export to Excel.
- Open the Excel file.
- On the Lookups tab, add new, delete existing, or reorder lookup items.
- Save the Excel file.
- In ProjectSight, open the settings.
- On the navigation toolbar, select
(Import/Export) > Update from Excel.
- Select the Excel file to import.
- In the import error message, select Review errors.
- Review the Feedback column and fix the associated errors.
- Save the Excel file.
- In ProjectSight, open the settings.
- On the navigation toolbar, select
(Import/Export) > Update from Excel.
- Select the Excel file to import.
The records with errors are exported to a new Excel file.
You can delete lookup items that are in use. A deleted lookup item remains linked to a record or item if it was previously selected, but you can't select the deleted lookup item for anything else.
- Hover over the item, and then select
(Remove).

