Content is not applicable for Go or Free projects.
Checklists
Use checklists to track items and activities that you must verify, check, and inspect on site. Checklists ensure that your project stays on track.
License: Certain actions, such as adding checklist records, require a license as well as security permission. Contact your project administrator if you are unable to perform some actions using the mobile app.
Required fields:
- If auto-numbering is on, numbers are assigned to checklist records with non-draft statuses when they're synced to the database.
- Required fields are marked with an asterisk (*) and are enforced for non-draft records.
Workflow statuses:
- Draft checklist records are visible to the user who created them and the Portfolio Administrator.
- Checklist records can't be changed back to the Draft status.
- Checklist records with a locked status can't be edited or deleted.
-

- Opens the Approval section with a list of configured approvers
- Save the record
- Sub-menu: Select to add an approver or checklist item, or to copy the record.
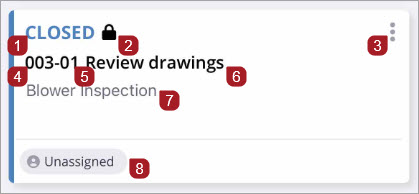
- Checklist template used to create this checklist
- Checklist module
- Number - Not visible in Draft mode if checklists are set to auto-increment (web > general settings)
- Record status
- Checklist template revision number
- Subject
- Location of this checklist
- Courtesy copied
- Select to pin the record to a drawing, or link it to drawings, photos, or videos
-
- Description
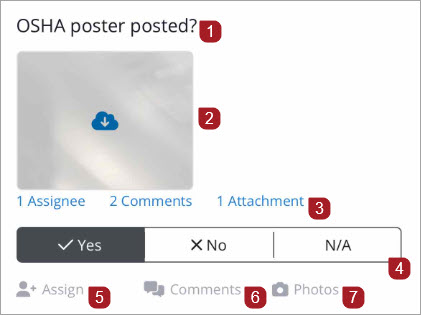
- Photo carousel - excludes photos attached to a comment
- Select to view who this item has been assigned to, the comments, and attachments
- Select Yes (to approve), No (to reject), or N/A (not applicable)
- Assign it to a project contact
- Add comments and include supporting photos or files
- Add photos - these will appear on the photo carousel
Creating
- In the Checklists list view, select
 .
. - Choose a checklist template, then select Add.
- Add a subject for your checklist.
- Select Done.
-
To send courtesy copies, select CC.
- Enter additional details, then select
 .
.
Contact your project administrator if no checklist templates are available.
When you copy a checklist, a new revision is created based on the checklist template. Only the subject, any custom field data, and the location are copied.
For steps on how to copy checklists, see Copy Record.
Editing
From your mobile device, you can add additional items to your checklist.
These new items are only added to your current checklist and will not apply to the checklist template from which the checklist was created.
- Open a checklist.
- On the top-right corner, select
 .
.
- Select Add checklist item.
- Select the checklist type to add it or select None to add a label with no additional data-entry fields.
- Optionally, include a Yes/No/NA toggle for Currency, Date, Date and Time, Number, Text, and Time checklist types.
- Enter a short description, then select Done.
- Select Add.
- Select .
The new checklist item is added to the bottom of the checklist under the Additional Items section.
- Open a checklist.
- Scroll down to the signature checklist item.
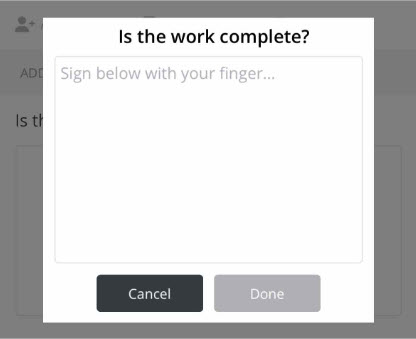
- Select Tap to sign.
- Use your finger to sign the signature card.
- Select Done to save your signature and return to the record.
- Select a date from the Date field.
- Select Done.
- Enter your first and last name in the Name field.
- Select Done.
- Select Assign to assign this item to a project contact. A notification is sent to the assignee.
- Select Comments to enter your comments. Photos or files included in the comment are not displayed in the checklist item's photo carousel.
- Select Photos to take a photo or video. Photos are displayed in the photo carousel.
- Select
 .
.
A pop-up signature card displays.
—Or—
Select Undo ![]() to erase your signature.
to erase your signature.
—Or—
Select Cancel to return to the record.
The Checklists record list displays.
- In the record view, select Status.
- To search the list, enter text in the Search field.
- In the record view, select
 .
.
A Status page displays with a list.
—Or—
To choose an item from the list, select it, then select Select to return to the record view.
—Or—
To return to the record view without making changes, select <.
- In the Location box, select >.
- Choose a location from the list.
- Select Select.
- Select .
The location hierarchy is set in the web application.
Approving / Rejecting
- Open a checklist.
- Review the checklist item to accept, then select Yes (approve) or No (reject).
- Select Assign to assign this item to a project contact. A notification is sent to the assignee.
- Select Comments to enter your comments. Photos or files included in the comment are not displayed in the checklist item's photo carousel.
- Select Photos to take a photo or video. Photos are displayed in the photo carousel.
- Select
 to access the Approvals page.
 - Select your approvers card where you can enter your signature and indicate the status of your approval task. This status will not affect the status of the checklist item.
- Select Done.
- Select < to return to the checklist record.
- Select .
- Open a checklist.
- On the top-right corner, select > Add Approver.
- Select Select from contacts.
- Choose the contacts, then select Confirm.
- Select <.
- Select .
—Or—
On the top-right corner, select ![]() >
> ![]() .
.
- Open a checklist.
- On the top-right corner, select
 > Add Approver.
 - Select Add New.
- Enter the required fields.
- Select Add.
- Select <.
- Select .
—Or—
On the top-right corner, select ![]() >
> ![]() .
.
The new approver will not be saved to the project contact list.
Only approvers with a Pending or Rejected status can be deleted. Approvers with an Approved status cannot be deleted.
- Open a checklist.
- On the top-right corner, select .
- Select the approver that you want to delete.
- Select
 .
. - Select Delete
- Select <.
- Select .
Attaching and pinning
-
To attach photos and videos, or how to view and delete attachments, see Photos / Videos
Linking / Annotating
-
To annotate a drawing and link it to this checklist, see Drawing Annotations.
-
To link records or drawings to a checklist, see Linking Records or Drawings.