You can link different types of items to a record. The linked items appear in the activity stream and the Links panel. Depending on the linked item, the link is one-way (only appears in the originating item) or two-way (appears in the originating item and the linked item).
- Open the full record.
- On the navigation toolbar, click link (Links).
- In the Links panel, in the Search field, enter the search terms.
On each tab, the search terms apply to the file name, record number, and subject. The tab numbers are updated according to the search results.
- In the Links panel or in the activity stream, click the item.
- From Drawing A, you open Record 1.
- From Record 1, you open Record 2.
- From Record 2, you open Drawing B.
You open a series of linked items:
When you close Drawing B, the original item (Drawing A) is displayed.
Items that are selected for linking appear in the Pending list of the Add Link popover, in the comments field, and on the appropriate tab of the Links panel. After the record is saved, the linked items also appear in the activity stream on the Comments tab.
- In the Links panel, click add (Add Link).
- Click Single and then take a photo or video with your iPad camera.
- On the File page, edit the description and name.
 If you took or selected a photo, add annotations to it.
- To close the File page, click arrow_back Done.
—Or—
Click Camera Roll, and then select an existing photo or video.


To add more annotations to a linked photo before it's uploaded, you can open the photo again from the Links panel or comment.
After you sync your data, the file is uploaded to the quick upload folder that's named in the record settings.
- In the Links panel, click add (Add Link).
- Click Multiple and then take a photo with your iPad camera.
-
Click Use Photo to keep the photo or Retake to take a new one.
-
Take additional photos. When you are done, tap Cancel.
The photos are linked to the record.
Annotations are not available when taking multiple photos.
- In the Links panel, click add (Add Link).
- Click Library, and select the file from the File Library.
- To close the File page, click arrow_back Done.
- In the Links panel, click add (Add Link).
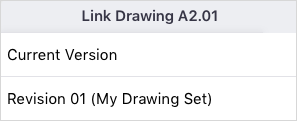
- Click Drawings, and then select the drawing series.
- Select the current version or a specific revision from the drawing series.
- Current version: The link always points to the current published version and is updated when a new revision is published.
- Specific revision: The link always points to the selected revision.
Revisions with same group and number values belong to the same drawing series.
- In the Links panel, click add (Add Link).
- Click Records, and then select the record type.
- Create a record, and link to it.
—Or—
Select an existing record from the list.
If you link to or from a checklist, the link goes to the selected revision, even if another revision is created later.
- In the Links panel, click add (Add Link).
- Click Web.
- Enter the description and the URL, and then click Done.
To view linked items, download them to ProjectSight for iPad while you're working online.
- On the navigation toolbar, click
 (Select Mode).
 - To select more records, click each one.
- Click
 (Download).
—Or—
To select all the records, click done_all (Select All) on the navigation toolbar.
- Click the item, and then click Yes.
You can remove a linked item from the record in the following ways:
- Remove the item from the Links panel. The link is removed, but the item remains in ProjectSight.
- Delete the linked item from ProjectSight. The item no longer appears in the Links panel of any record that it was linked to.
- In the Links panel, click add (Add Link).
- To the right of the item, click delete (Remove).
The Pending list appears at the bottom of the Add Link popover.
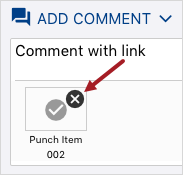
- In the comments field, on the linked item, click cancel (Remove).
- In the Links panel, on the linked item, click more_horiz (More) > Remove.