You can add annotations for notes and for linking items to specific areas of a drawing. When you add an annotation, it's automatically private (visible only to you). However, you can make it public, so it's available for other people.
You add some text annotations to a drawing to capture some rough notes. Later you edit your notes and add some annotations that are linked to related files. Then you make the annotations public, so other project members can see them.
In the Drawings view, the indicator color on the tile signals if the drawing has any annotations that are visible to you:
- (Gray): No annotations.
- (Blue): Only public annotations.
- (Red): At least one private annotation.
When a new revision is published, only the annotations from the most recent revision are included. If you add annotations to an old revision after a new one is published, they aren't copied to the current version.
- If the Layers panel is closed, click layers (Layers) on the navigation toolbar.
- Ensure that Show Annotations is selected (check).
- To hide the public or private annotations, click Show Public Annotations or Show Private Annotations, so it's not selected.
- In the Records section, filter the annotations based on linked records.
- Record Types: The record types that you have access to.
- Status: The statuses for the record types that you have access to. This list is filtered based on the selected record types.
- Assigned To Contact: The project contacts with open assignments for linked records that are unlocked.
- Assigned To Company: The companies of the project contacts with open assignments for linked records that are unlocked.
- In the Annotations section, filter the annotations by their properties.
- Type: The annotation types.
- Color: The stroke and fill colors from the Annotation toolbar and Annotation menu.
- Created By: The users who added annotations that are visible to you. Your name is included even if you haven't added any annotations yet.
- To hide the labels for linked records, click Show Annotation Labels, so it's not selected.
- To hide the linked or unlinked annotations, click Show Linked Annotations or Show Unlinked Annotations, so it's not selected.
- An annotation must meet all the selected filters to be visible in the drawing.
- If you select any filters in the Records section, any annotations that are unlinked or linked to other items such as drawings are hidden.
- The selected filters are applied as new annotations are added or linked records are updated. If an annotation disappears, you can click Remove Applied Filters to see all the annotations.
- All the items in the Links panel are available even when the linked annotations are hidden.
- The selected filters are still applied when you click
 (Previous) or
  (Next) to navigate to another drawing.
- At the bottom of the drawing, click Remove Applied Filters.
—Or—
In the Layers panel, click Reset Filters.
The visibility of an annotation depends on who added the annotation, whether it's public or private, and what it's linked to. You can see an annotation if:
- It's an annotation that you added to the drawing.
- It's an unlinked public annotation.
- It's a public annotation that's linked to an item that you have access to.
In a drawing, you see the following annotations:
- A private annotation that you added and linked to a file.
- A public annotation that another user added and linked to an RFI that you have access to.
You don't see the following annotations:
- A private annotation that another user added.
- A public annotation that's linked to a draft record created by another user.
- Click the annotation.
- On the Annotation menu, turn the Public toggle on or off:
-
 (Public)
-
 (Private)
If you don't have permission to create and modify public annotations, you can make your own annotations public by linking them to a record, spec section, or specification set. To make the annotation private again, you can unlink the item.
The Annotation toolbar contains the tools for adding and styling annotations. For styling tools with multiple options, the button displays the most recently used one. When you click an annotation on the drawing, the toolbar displays the styling options that were used for it.
The selected styling options, such as the color and border width, apply to any new annotations that you add. You can also style the annotation after you add it.
| Default button | Name | Tool type | Description |
|---|---|---|---|
| | Pencil | Annotation | Draw a freehand line, straight line, or arrow. |

|
Cloud |
Annotation | Draw a cloud shape. |
| | Shape | Annotation | Draw a rectangle, circle, or polygon shape. |

|
Link | Annotation |
Add an annotation with a predefined shape that links to a record, drawing, or file. For more information about linking to annotations, see Links. |
| | Text | Annotation | Draw a text box, and enter the text. |

|
Color | Styling | Set the color for the text, stroke (line or border), and fill (background). |
| | Opacity | Styling |
For line annotations, set the opacity of the line. For cloud and shape annotations, set the opacity of the background fill color. |

|
Line width | Styling | Set the width for a line annotation or for the line around an annotation. |
After you add an annotation, you can edit it or link it to an item.
You can't copy and paste annotations.
- On the Annotation toolbar, select the styling tools.
- Click , and then select a tool.
- To draw the annotation, do one of the following:
-
 (Pencil) or lens (Highlighter): Click the drawing and draw the line. There's a brief delay before the annotation is created so you can draw multiple lines.
 - remove (Line) or (Arrow): Click the drawing and draw the line. To adjust the line, click and move an endpoint.
- (Multi-Point Line):
 Draw the first line, and then add the connected lines.
| Button | Name | Description |
|---|---|---|
|
|
Pencil | Freehand line |
| lens | Highlighter | Transparent freehand line |
| remove | Line | Straight line |
| | Arrow | Straight arrow |
| | Multi-Point Line | Series of connected straight lines |
To draw a straight line with a 0, 45, or 90 degree angle, press the Shift key as you draw the line, arrow, or multi-point line.
- On the Annotation toolbar, select the styling tools.
- Click
 or , and then select a shape.
 - To draw the annotation, do one of the following:
-
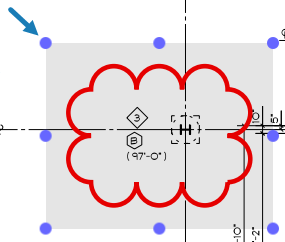
(Cloud), (Rectangle), or (Circle): Click the drawing and move the pointer to draw the shape.
-
 (Custom Cloud) or
  (Custom Shape): Draw the first side, and then add the other sides.
| Button | Name | Description |
|---|---|---|
|
|
Cloud | Rectangular cloud |

|
Custom Cloud | User-defined cloud |
| | Rectangle | Rectangular shape |
| | Circle | Round shape |

|
Custom Shape | User-defined shape |
- On the Annotation toolbar, click , and then select an item type.
- You only see the item types that you have access to.
- If a record is linked, a label with the record type and number is displayed below the annotation.
Record type abbreviations
- I: Issues
- P: Punch items
- RFI: Requests for information
- If a new drawing revision is published, the new revision displays the link to the record. However, the record doesn't display a link to the new revision.
- To add the annotation, click the drawing.
- Select the item to be linked.
| Button | Item type | Predefined shape |
|---|---|---|
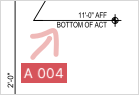
| | RFI | Red cloud |
| | Issue | Blue rectangle |
| | Punch item | Stamp (can't be resized or rotated)
The center color of the annotation matches the workflow status of the linked record. |

|
Drawing | Blue circle |

|
File | Blue circle |
—Or—
For a record link annotation, create or select a record.
The Create option is available only if you have permission to create this record type.
- On the Annotation toolbar, click Text.
- To place the text box, click the drawing.
- Type the text.
- In the text editor, format the text.
- To change the text color, click , and select a color.
- To add or remove the border, click .
- To change the text size, click A.
- Click Done.
The border and text size are updated when you close the text editor.
—Or—
Click outside of the text editor.
You can edit public annotations, if you have permission to do so, and your own annotations.
- Click the annotation.
- On the Annotation toolbar, do any of the following:
- To change the color of the text, line, and background, click (Color), and select the color.
- To change the opacity of the line (line annotations) or background color (cloud and shape annotations), click (Fill Opacity), and then select the opacity.
- To change the line width, click (Line / Border Size), and then select the width.
- Click the annotation.
- On the Annotation menu, click Edit Text.
- In the text editor, make the desired changes.
- Click Done.
—Or—
Click outside of the text editor.
- Click the annotation.
- To move the annotation, click and drag the middle of it.
- To resize the annotation, click and drag a sizing handle.
You can delete public annotations, if you have permission to do so, and your own annotations.
- Click the annotation.
- On the Annotation menu, click Delete.