![]() Search tips
Search tips
- To search in a subset of topics, select
 in the search field and select a filter.
 - To search for a specific word or phrase, add quotation marks around it (example: "team member") in the search field.
- To remove highlighting on the search terms in a topic, select
 .
. - To search within a topic, select
 , press Ctrl+F, and enter the search term.
ProjectSight Mobile
Take ProjectSight's cloud-based construction project management software with you in the field on your phone or tablet.


You can create different types of records to keep track of project information. You can also create reports for the records.
- Locked records, which have a locked status, can't be modified. Users with the Project Administrator security role can unlock records.
- Fields in a record can be locked if the record is linked to another record or used to create a new one.
- Several factors affect a user's access to specific records.
- In the project menu, select ModuleName > RecordType.
- If the Search panel is closed, select
 (Search) on the navigation toolbar.
 - Set the filters.
- The search terms are applied to text fields, including lookup lists, company and contact fields, and custom fields, in the records that you have access to.
- When you search by the assignee company or contact, only open assignments are searched.
- In the record module, select the record.
- Select
 (Expand) in the Information or Create panel.
 - Select
 (More) > Open Full Form on the record.
 - Select (More) > Open in New Tab on the record.
- Double-click the record.
- In the full record, select
 (Previous) or
  (Next) to open the previous or next record based on the list when the current record was opened.
If you want to open the full record, you can:
![]() (Previous) and
(Previous) and ![]() (Next) are not available when you open the record in a new tab.
(Next) are not available when you open the record in a new tab.
- On the navigation toolbar of the record, select
 (Save and Reload).
The record is saved and updated with the latest information from all users.
- In the record, on the navigation toolbar, select
 (Locked).
 - To keep the record open, select
 (Save).
—Or—
To close the record, select ![]() (Save).
(Save).
You can create a record or copy a record and then edit the details.
Required fields are marked with an asterisk (*) but aren't enforced for draft records.
- Open the record view.
- On the navigation toolbar, select Add.
- Enter the record details.
For more information, refer to the topic for each record type.
- Open the record view.
- In the tile or list view, on the record, select (More) > Copy.
Change orders can't be copied.
—Or—
Open the record, and then select ![]() (Copy) on the navigation toolbar.
(Copy) on the navigation toolbar.
- Changes to the original record are saved automatically when you copy the record.
- The description or question, comments, assignments, courtesy copies, and links aren't copied to the new record.
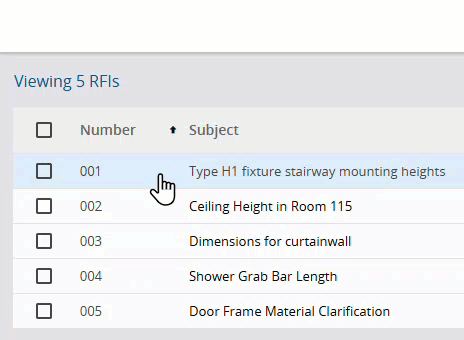
You can select multiple records and then update them with the same information.
- Batch editing isn't available for specification sets.
- Some changes may not be applied due to the record's status or missing required information.
- You select the following RFIs:
- Record A - Draft record that has all the required information.
- Record B - Draft record that's missing the question, which is required.
- Record C - Record that has a locked status.
- You change the Discipline field.
- You add a comment with a linked file.
- After you select Update:
- In Record A, all the changes are applied.
- In Record B, the Discipline field is updated, and the file is linked to the record. However, the new comment isn't added because the record doesn't have a question yet.
- In Record C, none of the changes are applied because the record is locked.
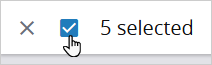
- Select the records.
- To switch to the Select mode, select the checkbox for a record.
- To choose more records, select each one.
- In the Batch Edit panel, update the information.
- To edit a field, select
 (Edit), and then select an option.
 - To mark your assignments as done, turn on the Mark my assignment as Done toggle.
- To add an assignment or courtesy copy, select Add, and then select the name.
- Add a comment.
- In the comments field, enter a comment.
- To link an item to the comment, select
 (Add Links), and then select an item.
 - To save the comment as the answer or resolution, turn on the Log as the Answer (RFIs), Mark as Approved Docs (submittals), or Log as the Resolution toggle.
- Select Update.
—Or—
To choose all the records, select the checkbox on the toolbar.
If the field is empty, it is cleared in the selected records when you select Update. To cancel a change, you can select ![]() by the field.
by the field.
A person can only be added once as an assignee or courtesy copy recipient, so duplicates are ignored when the changes are saved.
To resize the comments field, select and drag the edge of the field.

If a record already has an answer or resolution, the new one replaces it.
The confirmation dialog tells you how many records are updated successfully.
- At the bottom of the panel, select Reset.
If you edit an out-of-date field, your changes overwrite the previous changes when you save the record. The previous changes are logged on the History tab.
Your changes are saved automatically if you navigate to the previous or next record.
- To keep the record open, select (Save).
—Or—
To close the record, select ![]() (Save).
(Save).
- In the Create panel, select Save or Save + Add Another.
- Close the panel or select a different panel.
- Select another tile or row in the data view.
- Navigate away from the current data view.
—Or—
In the Information panel, select ![]() (Save).
(Save).
Changes are saved automatically in the Information panel when you:
If you select ![]() (Expand) before saving the changes, they're displayed in the record but aren't saved yet.
(Expand) before saving the changes, they're displayed in the record but aren't saved yet.
You can only delete unlocked records.
- Open the record type module.
- To switch to the Select mode, select the checkbox for a record.
- To choose more records, select each one.
- Select (More) > Delete Selected Records.
—Or—
To choose all the records, select the checkbox on the toolbar.
To delete one item, you can also:
- Select (More) > Remove on the item.
- Open the item, and then select (More) > Delete on the navigation toolbar.